
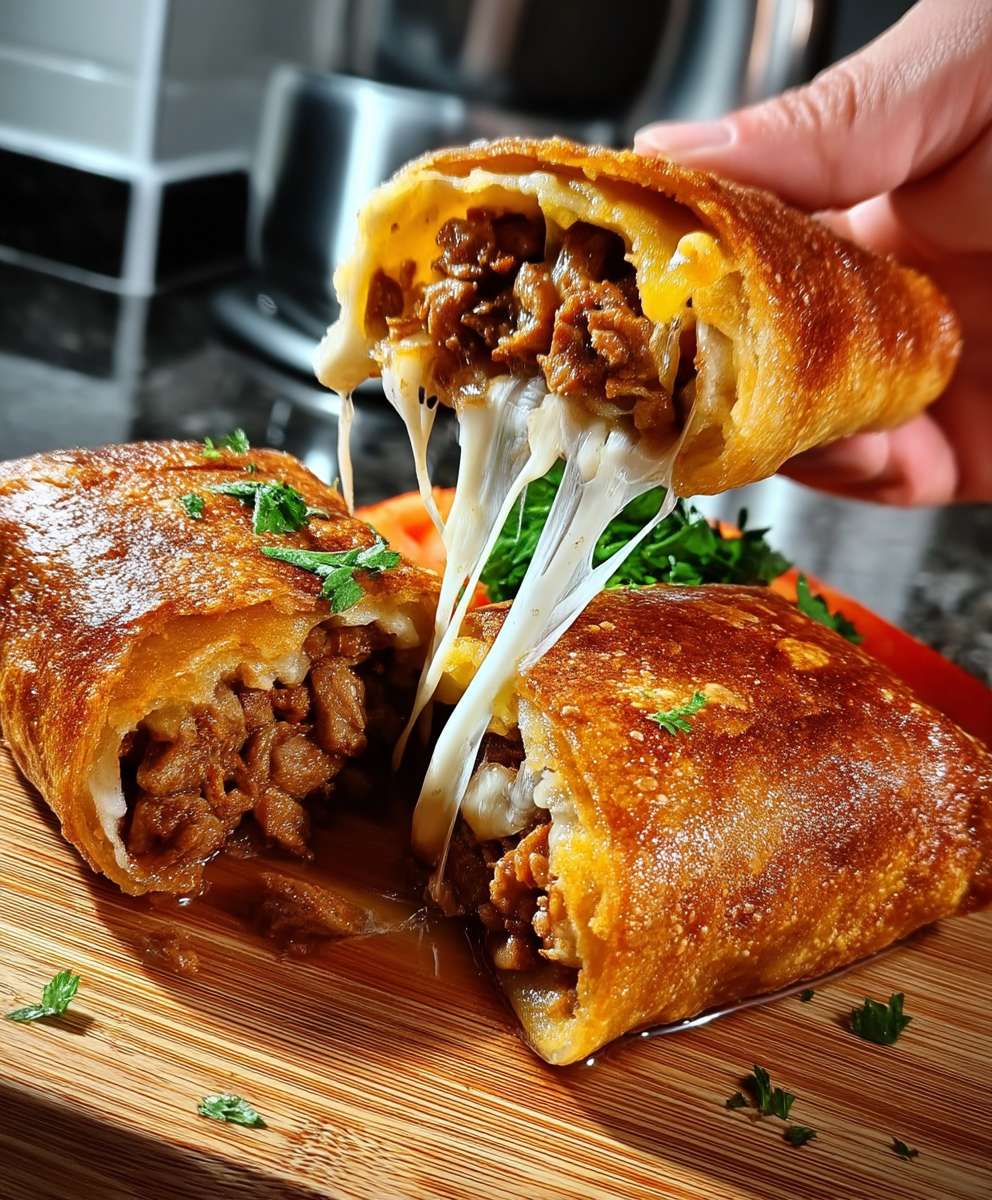
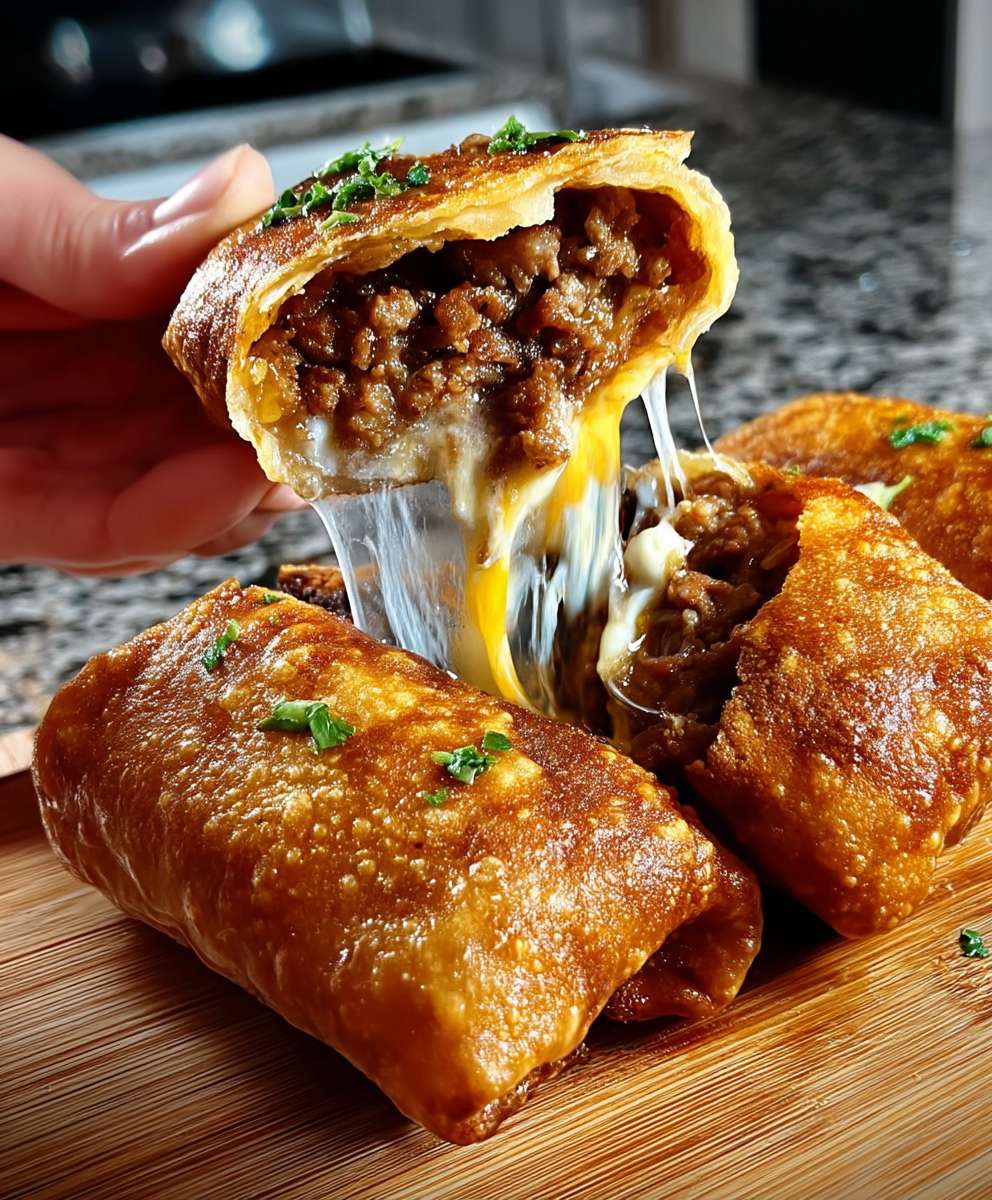
Sizzling, golden, and bursting with flavor, these Beef and Cheese Chimichangas are a testament to culinary ingenuity and pure comfort food bliss. Imagine a crispy exterior giving way to a rich, savory ground beef filling, perfectly melded with gooey, melted cheese – it’s a symphony for your taste buds. This recipe isn’t just about dinner; it’s about crafting memories, one irresistible bite at a time, often accompanied by happy sighs and requests for seconds. They are the kind of dish that transforms a regular Tuesday night into a fiesta, a culinary adventure that’s surprisingly approachable for even the most hesitant home chef. Forget bland meals; we’re diving headfirst into a world of vibrant spices and satisfying textures. Get ready to experience the magic of homemade chimichangas that will undoubtedly become a treasured staple in your recipe rotation. Here’s why you’ll absolutely adore this recipe:
- These delightful Beef and Cheese Chimichangas offer a fantastic blend of savory beef and creamy cheese, creating an irresistible flavor profile that everyone loves.
- The recipe is surprisingly straightforward, allowing even novice cooks to achieve perfectly crispy, golden-brown chimichangas with minimal fuss.
- Visually, these golden-fried (or baked!) pockets of deliciousness are incredibly appealing, making them a festive centerpiece for any meal or gathering.
- They are incredibly versatile; enjoy them as a satisfying main course or miniaturize them for a crowd-pleasing appetizer that disappears quickly.
The Allure of the Crispy Shell: More Than Just a Meal
There’s something undeniably captivating about a dish that promises both crunch and creamy, savory goodness. My first encounter with a chimichanga was, shall we say, memorable. It involved a slightly over-enthusiastic chef (me, of course), a sputtering pan of oil, and a near-miss with a kitchen towel that almost became a crispy accessory. Despite the minor theatrics, the resulting golden-brown pocket, oozing with cheesy beef, was pure revelation. It taught me that sometimes the greatest culinary rewards come from a little adventurous spirit and a willingness to embrace the sizzle. This isn’t just a recipe; it’s a story of triumph, a testament to the joy of creating something truly spectacular right in your own kitchen. And trust me, the journey to these Beef and Cheese Chimichangas is worth every single step.
Crafting the Perfect Beef Filling for Your Chimichangas
The heart of any truly great chimichanga lies in its filling. We’re talking about a richly seasoned ground beef mixture, simmered to perfection, and ready to mingle with a generous helping of cheese. It’s a delicate balance of savory, spicy, and satisfying. The secret often lies in building layers of flavor from the very start. Imagine the aroma of onions and garlic gently sautéing, releasing their sweet perfume, before the ground beef even hits the pan. This foundational step is crucial for developing a depth that will make your chimichangas sing.
Selecting Your Beef and Essential Aromatics
For the best results, opt for lean ground beef, around 80/20, which provides enough fat for flavor without making the filling greasy. As for aromatics, a finely diced yellow onion and minced garlic cloves are non-negotiable. They create the aromatic base that elevates the beef from simple to sensational. Don’t rush this step; allowing the onions to soften and become translucent before adding other ingredients ensures a sweeter, more nuanced flavor. Many times, I’ve been tempted to speed this up, only to regret not allowing the onions to properly caramelize and sweeten the entire mixture. Take your time, and your taste buds will thank you.
The Art of Seasoning and Simmering the Filling
Once your beef is browned and drained of any excess fat, it’s time for the magic of seasoning. A blend of chili powder, cumin, smoked paprika, and a pinch of cayenne pepper creates that classic, warm, and inviting profile. A splash of rich beef broth and a dollop of tomato paste add moisture and a beautiful depth of umami, ensuring the filling is succulent and never dry. Let this mixture simmer gently for at least 15-20 minutes, allowing the flavors to meld and intensify. This simmering process is where the real transformation happens, turning individual ingredients into a harmonious, irresistible filling. It’s during this phase that the kitchen fills with an aroma that beckons everyone closer.
The Cheesy Embrace: Adding the Golden Goodness
What’s a chimichanga without the cheese? It’s like a joke without a punchline – incomplete! The cheese is not just an ingredient; it’s the creamy, melting, gooey embrace that binds the savory beef filling together and elevates every bite to a new level of indulgence. Choosing the right cheese and incorporating it correctly is key to achieving that perfect texture and flavor. My personal preference leans towards a blend, but a good Monterey Jack or a mild cheddar works wonders on its own.
Choosing Your Cheesy Companion
For these Beef and Cheese Chimichangas, a good quality shredded cheese blend is your best friend. A Mexican blend, Monterey Jack, or even a sharp cheddar will all work beautifully. The key is to select a cheese that melts smoothly and offers a pleasant creaminess without overpowering the beef. Avoid pre-shredded cheeses that contain anti-caking agents, as they can sometimes prevent a truly smooth melt. Grating your own cheese, while a small extra step, makes a noticeable difference in the final product’s texture and creaminess. A chimichanga without properly melted cheese is just a sad, crispy taco.
Integrating the Cheese for Maximum Meltyness
You can incorporate the cheese in a couple of ways: either mix some directly into the warm beef filling before assembling, or layer it generously over the filling as you prepare each tortilla. I often do a combination of both – a little mixed in for internal creaminess, and a generous sprinkle on top for that satisfying cheese pull when you bite in. The warmth of the filling will help kickstart the melting process, ensuring a perfectly gooey center once the chimichangas are cooked. This careful layering of cheese creates pockets of pure bliss within each crispy shell.
Assembling Your Beef and Cheese Chimichangas Like a Pro
Assembling a chimichanga is an art form, a delicate dance between filling, folding, and securing. It’s the step where all your hard work from preparing the filling comes together into its final, beautiful form. Don’t be intimidated; with a little practice, you’ll be rolling these up like a seasoned pro. The goal is a tightly wrapped package that holds its shape through the cooking process, ensuring all that delicious filling stays safely inside its crispy shell.
Selecting and Preparing Your Tortillas
Large, soft flour tortillas are the foundation of any good chimichanga. They need to be pliable enough to fold without tearing. I find that warming them slightly in the microwave for 15-20 seconds or stacking them in a damp towel makes them much easier to work with. This slight warmth softens the gluten, making them more elastic and less prone to cracking as you fold. Trying to fold a cold, stiff tortilla is like trying to fold a piece of cardboard – a recipe for frustration and torn deliciousness.
The Art of Filling and Folding for a Perfect Seal
Lay a warmed tortilla flat. Spoon about 1/2 to 3/4 cup of the beef and cheese filling slightly off-center. Fold one side of the tortilla over the filling, then fold the top and bottom edges inward, creating an envelope shape. Finally, roll it tightly from the folded side to create a neat, compact cylinder. A common rookie mistake is overfilling, which makes sealing impossible and leads to cheesy explosions in your oil (trust me, I’ve been there). Use just enough filling to make it plump, but not so much that it’s bursting at the seams.
Crispy Perfection: Frying or Baking Your Chimichangas
Now for the grand finale: achieving that coveted crispy exterior. While traditionally deep-fried, you can absolutely bake these Beef and Cheese Chimichangas for a slightly lighter, less messy option that still delivers on crunch. Both methods have their merits, and both will result in a truly satisfying meal. Whether you prefer the golden sizzle of the fryer or the even bake of the oven, the goal remains the same: a beautifully crisp shell encasing a warm, flavorful interior.
Deep-Frying for Traditional Crispness
If you’re going for the classic, deep-fried experience, heat about 2-3 inches of neutral oil (like vegetable or canola oil) in a heavy-bottomed pot or Dutch oven to 350°F (175°C). Carefully place 2-3 chimichangas into the hot oil, seam-side down first, and fry for 2-4 minutes per side, or until deeply golden brown and crispy. Use tongs to carefully turn them. Once golden, transfer them to a wire rack set over a paper towel-lined baking sheet to drain any excess oil. This method gives you that iconic restaurant-style crunch.
Baking for a Lighter Alternative
For a baked version, preheat your oven to 400°F (200°C). Lightly brush or spray the assembled chimichangas with a little oil on all sides. Place them on a baking sheet, seam-side down, and bake for 20-25 minutes, flipping them halfway through, until they are golden brown and crispy. While not quite the same crunch as deep-frying, baking still provides a wonderfully satisfying texture and is a fantastic option if you’re looking to cut down on oil. The oven still works wonders in achieving that desirable golden crust.
Serving Suggestions for Your Delicious Chimichangas
Once your Beef and Cheese Chimichangas emerge, golden and magnificent, from the fryer or oven, the real fun begins: serving them! They are fantastic on their own, but they truly shine when paired with an array of fresh, vibrant toppings and sides that complement their rich flavors. Think bright, tangy, and refreshing elements to balance the savory goodness. Consider a dollop of cool sour cream or plain Greek yogurt, a sprinkle of fresh cilantro, diced avocado or a generous scoop of guacamole, and a vibrant pico de gallo or salsa. A squeeze of fresh lime juice can also work wonders, adding a zesty kick that cuts through the richness. For a more substantial meal, serve them alongside a simple side of seasoned rice or black beans. These accompaniments not only add color and texture but also enhance the overall dining experience, turning a simple meal into a feast.
Ingredients for Beef and Cheese Chimichangas
Here’s what you’ll need to make this delicious dish:
- Lean Ground Beef (80/20)This provides a flavorful base without making the filling overly greasy, ensuring a rich and satisfying texture.
- Large Flour TortillasOpt for soft, pliable tortillas that are easy to fold without tearing, essential for creating neat, sealed packages.
- Shredded Cheese (Mexican Blend, Monterey Jack, or Cheddar)Choose a cheese that melts smoothly and adds creamy, savory goodness, tying the filling together.
- Yellow OnionFinely diced, it provides a sweet, aromatic foundation when sautéed, adding depth to the beef filling.
- Garlic ClovesMinced garlic contributes a pungent, savory aroma and flavor that is crucial for building the dish’s complexity.
- Beef BrothA splash of broth keeps the beef filling moist and adds a rich, umami depth, preventing it from drying out during simmering.
- Tomato PasteThis concentrated paste adds a subtle tang and beautiful richness, enhancing the overall savory profile of the filling.
- Chili PowderA staple seasoning that brings warmth and a characteristic mild spice, essential for that classic flavor.
- CuminEarthy and slightly warm, cumin is a key spice that adds an authentic, aromatic touch to the beef mixture.
- Smoked PaprikaThis provides a lovely smoky depth and a vibrant red hue, contributing a nuanced flavor that is distinctly delicious.
- Cayenne PepperA small pinch adds a gentle kick of heat, which you can adjust to your preferred spice level, giving the chimichangas a bit of a zesty edge.
- Vegetable or Canola OilEssential for frying the chimichangas to a beautiful, golden-brown crisp, ensuring a perfect texture.
- Salt and Black PepperTo taste, these basic seasonings are crucial for balancing and enhancing all the other flavors in the beef filling.
The full ingredients list, including measurements, is provided in the recipe card directly below.
How to Make Beef and Cheese Chimichangas
Follow these simple steps to prepare this delicious dish:
Step 1: Prepare the Beef Filling
In a large skillet, brown the ground beef over medium-high heat. Break it apart with a spoon as it cooks. Once fully browned, drain any excess fat. Add the diced yellow onion and minced garlic to the skillet, cooking until the onion softens and becomes translucent, about 5-7 minutes.
Step 2: Season and Simmer the Filling
Stir in the chili powder, cumin, smoked paprika, cayenne pepper, tomato paste, beef broth, salt, and black pepper. Mix well to combine all ingredients. Bring the mixture to a gentle simmer, then reduce the heat to low, cover, and let it cook for 15-20 minutes, allowing the flavors to meld beautifully. Remove from heat and stir in about half of the shredded cheese, letting it melt into the warm beef mixture.
Step 3: Warm Tortillas and Assemble Chimichangas
Warm your flour tortillas slightly in the microwave for about 15-20 seconds or in a dry skillet to make them pliable. Lay a warmed tortilla flat. Spoon about 1/2 to 3/4 cup of the beef and cheese filling onto the center of the tortilla. Sprinkle with additional shredded cheese, if desired. Fold one side of the tortilla over the filling, then fold the top and bottom edges inward. Finally, roll it tightly from the folded side to create a neat, compact cylinder, ensuring the seam is secure. Repeat with the remaining tortillas and filling.
Step 4: Cook the Chimichangas
To deep-fry: Heat 2-3 inches of vegetable or canola oil in a heavy-bottomed pot or Dutch oven to 350°F (175°C). Carefully place 2-3 chimichangas into the hot oil, seam-side down first. Fry for 2-4 minutes per side, or until deeply golden brown and crispy. Transfer them to a wire rack set over paper towels to drain excess oil. To bake: Preheat your oven to 400°F (200°C). Lightly brush or spray the assembled chimichangas with oil. Place them seam-side down on a baking sheet and bake for 20-25 minutes, flipping halfway through, until golden brown and crispy.
Step 5: Serve and Enjoy
Once cooked, immediately transfer the golden Beef and Cheese Chimichangas to serving plates. Garnish with your favorite toppings such as sour cream, guacamole, salsa, or fresh cilantro. Transfer to plates and drizzle with sauce for the perfect finishing touch.
The Accidental Discovery of Sunshine on a Plate
My journey to mastering Beef and Cheese Chimichangas began with a laughably bad kitchen experiment gone right. One frantic Tuesday, attempting to salvage leftover beef and tortillas, I haphazardly fried the filled wraps. The result? A crispy, gooey, unexpected triumph that tasted like pure sunshine on a plate, forever changing my weeknight dinner game.
Perfecting the Cooking Process
For efficiency and delicious results, always brown the seasoned ground beef first. While the beef simmers with its spices, you can warm your tortillas to make them pliable, then prepare your cheese and other fillings. This sequence ensures a smooth workflow, allowing you to assemble and fry your glorious Beef and Cheese Chimichangas without missing a beat.
Add Your Touch
Feel free to personalize these Beef and Cheese Chimichangas. Swap out cheddar for a Monterey Jack or a spicy pepper jack. Incorporate black beans or corn into the beef mixture for added texture, or sprinkle in some chopped jalapeños for a kick. A dash of smoked paprika or a squeeze of lime juice can also elevate the flavors beautifully.
Storing & Reheating
To keep your chimichangas delicious, store cooled leftovers in an airtight container in the refrigerator for up to three days. Reheat them in an oven or air fryer at 350°F (175°C) for 10-15 minutes until crispy again. Microwaving is quicker but might make them less crispy, though still tasty.
The Heart of the Home: Crafting Your Chimichangas
There’s something uniquely satisfying about creating a dish that’s both comforting and exciting. Beef and Cheese Chimichangas perfectly fit that bill, offering a delightful crunch followed by a burst of savory, cheesy goodness. This recipe isn’t just about cooking; it’s about bringing a little fiesta into your kitchen, turning simple ingredients into a meal that feels like a special occasion. Forget soggy, bland imitations; we’re diving into the world of truly spectacular homemade chimichangas that will have everyone asking for seconds.
Gather Your Culinary Arsenal: Ingredients
Making these crispy, flavorful Beef and Cheese Chimichangas requires a selection of fresh ingredients, ensuring every bite is packed with taste. Before you begin, gather everything you need so your cooking process flows as smoothly as a perfectly melted cheese pull.
- 1 tablespoon vegetable oil (or canola oil)
- 1 pound lean ground beef
- 1 medium onion, finely chopped
- 2 cloves garlic, minced
- 1 teaspoon chili powder
- 1/2 teaspoon ground cumin
- 1/4 teaspoon smoked paprika
- Salt and freshly ground black pepper to taste
- 1/2 cup beef broth
- 1 (8 ounce) can tomato sauce
- 1/2 cup chopped fresh cilantro, plus extra for garnish
- 8 large (10-inch) flour tortillas
- 2 cups shredded cheddar cheese (or a cheddar-Monterey Jack blend)
- Vegetable oil for frying (approximately 4-6 cups, depending on your pot)
- Optional toppings: sour cream or plain Greek yogurt, salsa, guacamole, sliced green onions
The Chimichanga Chronicle: Step-by-Step Instructions
Embark on this culinary adventure with confidence. Each step is designed to guide you to the perfect, golden-brown Beef and Cheese Chimichangas that are crispy on the outside and wonderfully gooey on the inside.
- Prepare the Beef Filling:Heat 1 tablespoon of vegetable oil in a large skillet over medium-high heat. Add the ground beef and chopped onion, cooking until the beef is browned and the onion is softened, about 6-8 minutes. Drain any excess grease.
- Flavor the Filling:Stir in the minced garlic, chili powder, ground cumin, and smoked paprika. Cook for another minute until fragrant. Season generously with salt and pepper.
- Simmer to Perfection:Pour in the beef broth and tomato sauce. Bring the mixture to a simmer, then reduce the heat to low, cover, and cook for 10-15 minutes, allowing the flavors to meld beautifully. Stir in the chopped cilantro. Remove from heat and let it cool slightly.
- Warm the Tortillas:While the beef cools, warm the tortillas to make them pliable. You can do this by wrapping them in a damp paper towel and microwaving for 30-60 seconds, or by heating them briefly on a dry skillet over medium heat, about 10-15 seconds per side.
- Assemble the Chimichangas:Lay a warm tortilla flat. Spoon about 1/2 cup of the beef mixture slightly off-center towards one edge. Sprinkle generously with about 1/4 cup of shredded cheese. Fold the sides of the tortilla over the filling, then roll it up tightly from the bottom, creating a sealed package. Repeat with the remaining tortillas and filling.
- Heat the Frying Oil:In a large, heavy-bottomed pot or Dutch oven, pour enough vegetable oil to reach a depth of about 2-3 inches. Heat the oil over medium-high heat to 350-375°F (175-190°C). Use a kitchen thermometer to ensure the correct temperature.
- Fry the Chimichangas:Carefully place 1-2 chimichangas into the hot oil, seam-side down, making sure not to overcrowd the pot. Fry for 3-5 minutes, turning occasionally, until they are golden brown and crispy on all sides.
- Drain and Serve:Remove the chimichangas from the oil with tongs and place them on a plate lined with paper towels to drain excess oil. Let them cool for a few minutes before serving.
- Garnish and Enjoy:Garnish your hot, crispy Beef and Cheese Chimichangas with extra cilantro, and serve immediately with your favorite toppings like salsa, guacamole, and a dollop of sour cream or Greek yogurt.
The Flavor Fiesta: Serving Suggestions
These Beef and Cheese Chimichangas are a meal in themselves, but pairing them with the right accompaniments elevates the experience. Think beyond just salsa and sour cream (though those are always fantastic!). A crisp side salad with a zesty lime vinaigrette offers a refreshing counterpoint to the richness of the chimichangas. For a heartier meal, consider serving them alongside fluffy Mexican rice or a simple bowl of black beans. Don’t forget an array of vibrant toppings—pico de gallo, a homemade avocado crema, or even pickled red onions can add layers of flavor and texture that truly complete the dish.
Beyond the Basics: Expert Tips for Chimichanga Mastery
You’ve got the recipe, now let’s talk about those little secrets that turn a good chimichanga into a legendary one. These tips come from countless hours of kitchen experimentation, ensuring your cooking journey is smooth and the results are consistently amazing.
-
Don’t overfill your tortillas; a moderate amount of filling allows for easier rolling and helps prevent blowouts during frying, ensuring your Beef and Cheese Chimichangas stay intact.
-
Maintain consistent oil temperature while frying. If the oil is too cold, your chimichangas will be greasy; too hot, and they’ll burn before the inside is properly heated.
-
For an extra crispy exterior, lightly brush the rolled chimichangas with a little oil before air frying them at 400°F (200°C) for about 12-15 minutes, flipping halfway.
My grandmother once told me her secret to perfect crispy food was “listening to the sizzle.” That really stuck with me, and applying it to these chimichangas means getting that oil just right for a symphony of crispiness.
Conclusion for Beef and Cheese Chimichangas
Creating these Beef and Cheese Chimichangas is more than just cooking; it’s an invitation to a crispy, savory adventure right in your kitchen. We’ve covered everything from browning the beef to achieving that perfect golden fry, ensuring your homemade chimichangas are far superior to any takeout. With a few simple steps and clever tips, you can enjoy these delightful, cheesy pockets of flavor, customized to your taste. So gather your ingredients, unleash your inner chef, and prepare for a meal that promises smiles, satisfied sighs, and perhaps even a happy dance or two.
Print
Beef and Cheese Chimichangas
- Total Time: 35 minutes
- Yield: 4 servings 1x
Description
Whip up amazing Beef and Cheese Chimichangas! Savor the rich, seasoned ground beef and gooey melted cheese, expertly rolled in warm tortillas. Get detailed instructions and nutrition info.
Ingredients
- 1 lb ground beef (80/20 preferred)
- 8 large flour tortillas (burrito size)
- 2 cups shredded Mexican blend cheese
- 1 packet (1 oz) taco seasoning mix
- 1/2 medium yellow onion, finely chopped
- 2 cloves garlic, minced
- 3 cups vegetable oil, for frying
Instructions
- Step 1: Prepare the Beef Filling. In a large skillet, brown the ground beef over medium-high heat. Drain any excess grease. Add the finely chopped onion and minced garlic, cooking until the onion is softened, about 3-5 minutes. Stir in the taco seasoning mix with 1/4 cup of water, bring to a simmer, and cook until the liquid has mostly evaporated, about 2-3 minutes. Remove from heat and stir in 1/2 cup of the shredded cheese until melted and combined.
- Step 2: Assemble the Chimichangas. Slightly warm the tortillas (microwave for 15-20 seconds each) to make them more pliable. Lay a tortilla flat and spoon about 1/2 cup of the beef mixture down the center. Sprinkle with an additional tablespoon or two of shredded cheese. Fold in the sides of the tortilla, then tightly roll it up from the bottom to create a sealed package. Repeat with the remaining tortillas and filling.
- Step 3: Fry the Chimichangas. Heat the vegetable oil in a large deep skillet or Dutch oven over medium-high heat to 350-375°F (175-190°C). Carefully place 2-3 chimichangas into the hot oil, seam-side down, ensuring not to overcrowd the pan.
- Step 4: Cook Until Golden. Fry for 3-5 minutes, turning occasionally, until all sides are golden brown and crispy. Remove the chimichangas with tongs or a slotted spoon and place them on a plate lined with paper towels to drain excess oil.
- Step 5: Serve. Serve the Beef and Cheese Chimichangas hot, garnished with your favorite toppings such as sour cream, salsa, guacamole, or chopped cilantro.
Notes
- Store any cooled leftover chimichangas in an airtight container in the refrigerator for up to 3 days; for a longer option, you can freeze them individually after they've cooled completely.
- For ultimate crispiness when reheating, pop leftover chimichangas in an oven preheated to 350°F (175°C) for 10-15 minutes, or use an air fryer until warmed through and crunchy.
- Elevate your chimichangas with a vibrant Pico de Gallo or a dollop of cool, creamy avocado crema to balance the richness.
- For perfectly crispy, non-greasy chimichangas, maintain your frying oil temperature diligently between 350-375°F; a thermometer is your best friend here to ensure a golden crust without a soggy interior.
- Prep Time: 15 minutes
- Cook Time: 20 minutes
- Method: Stovetop
- Cuisine: American
Nutrition
- Serving Size: 1 large chimichanga (approx. 350g)
- Calories: 850
- Sodium: 1200mg
- Fat: 60g
- Saturated Fat: 25g
- Trans Fat: 0.5g
- Protein: 3g


Leave a Comment