
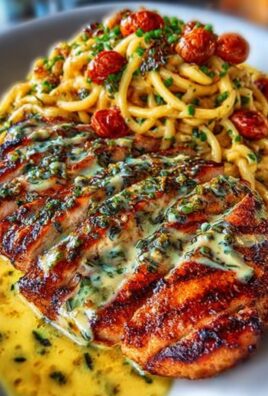
The moment that crispy, golden crust cracks and the molten cheese oozes out, you know you’ve hit culinary gold. Forget bland weekday sandwiches; we are fusing two comfort food legends into one gloriously easy, flavor-packed creation that demands attention. This is the legendaryGarlic Bread Grilled Cheese 🍞🧀 | The Ultimate 15-Min Lunch You’ll Crave Every Day—a quick, buttery miracle ready to rescue your lunch break from the clutches of monotony.
- Incredibly easy to make, this gourmet upgrade requires only 15 minutes and minimal effort, perfect for busy schedules and sudden cravings.
- The flavor profile is intensely rich, combining savory roasted garlic butter with sharp, stretchy cheddar and creamy provolone cheese blend.
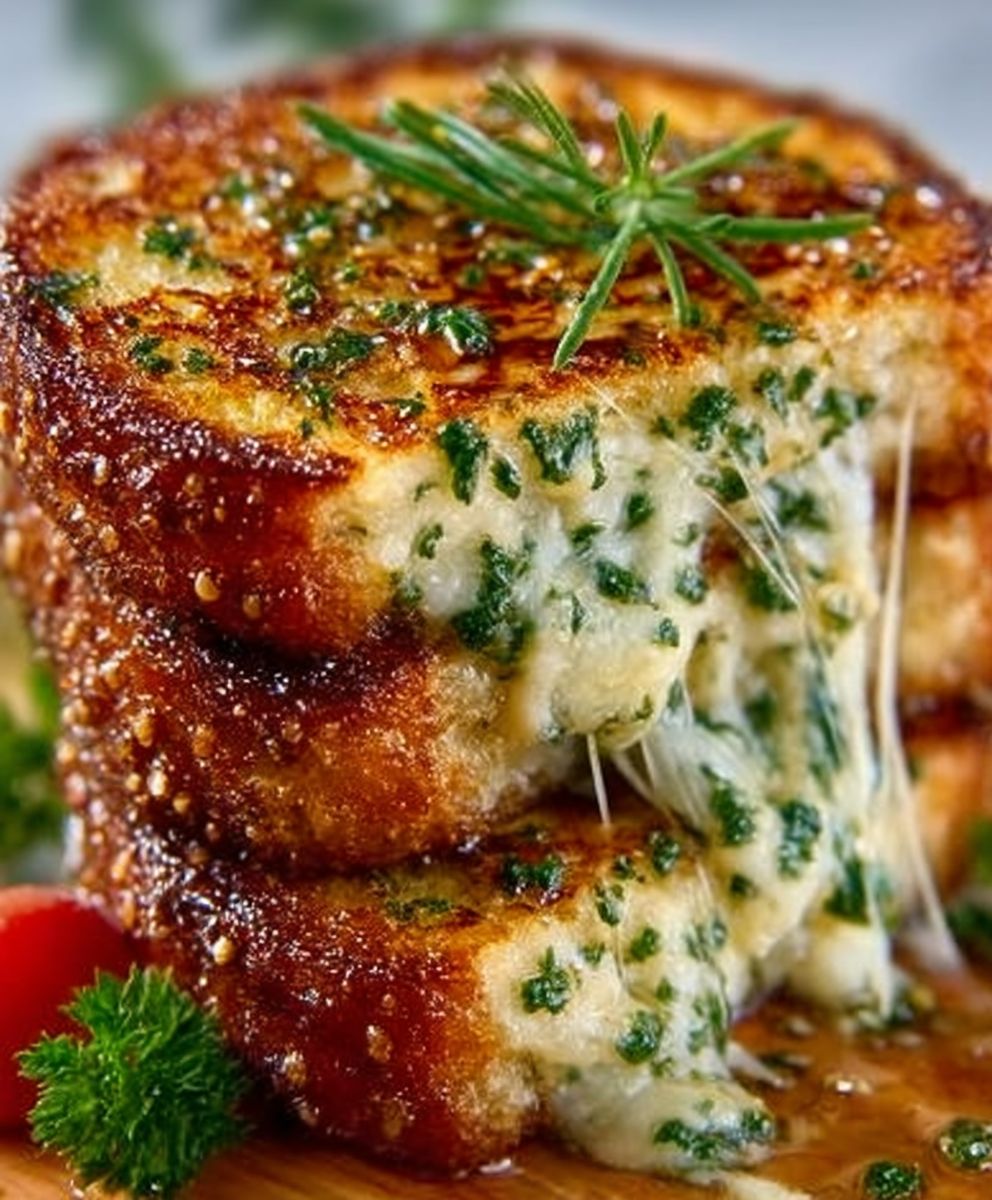
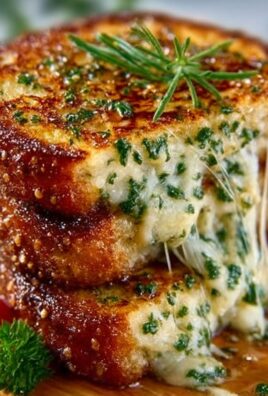
- Visually, the sandwich achieves a perfect golden-brown crispness, making it highly photogenic and deeply satisfying to bite into immediately.
- It is incredibly versatile, pairing flawlessly with a simple bowl of tomato soup or serving as a hearty side to any weeknight salad or entree.
The Culinary Origin Story: When Comfort Foods Collide
We’ve all been there: standing in front of the refrigerator, hunger peaking, staring into the abyss of half-eaten leftovers and wilting produce. You need something fast, something satisfying, something that screams, “I love carbs and I am not apologizing for it.” For years, the grilled cheese sandwich has been the stalwart hero of the quick lunch brigade, dependable yet often a little dull. And garlic bread? That’s the flamboyant sidekick, usually reserved for pizza night or Italian feasts, dripping with buttery goodness and demanding breath mints afterward.
One fateful afternoon, during a particularly intense period of lunch inspiration—or perhaps, sheer desperation—I realized the obvious: why keep these two superstars separated? Why limit garlic bread’s incredible flavor profile to just a side dish? The answer was a definitive “We shouldn’t!” And thus, the glorious union occurred. The initial experiment was messy, greasy, and undeniably transcendent. It quickly became clear that infusing the classic grilled cheese with the pungent, savory punch of garlic butter wasn’t just an improvement; it was an evolution. This sandwich doesn’t just fill you up; it changes your outlook on life, at least for the 15 minutes it takes to devour it.
Why the Garlic Butter Base Changes Everything
The secret weapon of this recipe is not the cheese—though we will certainly get to that important topic—but the foundation: homemade garlic butter. Forget those waxy, pre-packaged garlic bread loaves. We are making a quick, powerful spread that not only imparts deep flavor but also ensures the perfect golden crust. Using unsalted butter allows you to control the salinity, while fresh minced garlic provides that essential sharp bite. A small addition of dried parsley gives it visual appeal, making your sandwich look like it just stepped off the cover of a fancy magazine, despite its humble origins.
Traditional grilled cheese relies on a coating of plain butter or maybe mayonnaise for crisping. While effective, these methods lack personality. By substituting that plain fat with a highly aromatic garlic and herb blend, you are essentially pre-flavoring the bread before it even hits the pan. As the sandwich cooks, the garlic gently toasts, releasing its perfume and creating a crust that is crunchy, savory, and unbelievably intoxicating. This approach turns the bread itself into an active flavor component, elevating theGarlic Bread Grilled Cheese 🍞🧀 | The Ultimate 15-Min Lunch You’ll Crave Every Dayfar above its humble origins.
Mastering the Melt: The Secret to Stretchy Perfection
A good grilled cheese must have a great melt. The cheese should stretch like a delicious, dairy-based slinky when you pull the halves apart. Achieving this iconic melt requires two key elements: smart cheese selection and precise temperature control. Many novice sandwich makers make the mistake of cranking the heat to high, seeking a faster result. This only leads to a burnt exterior and a cold, stubborn block of cheese hiding miserably inside. We aim for culinary harmony, where the external crisping finishes exactly when the internal melting completes.
Choosing Your Champion Cheeses
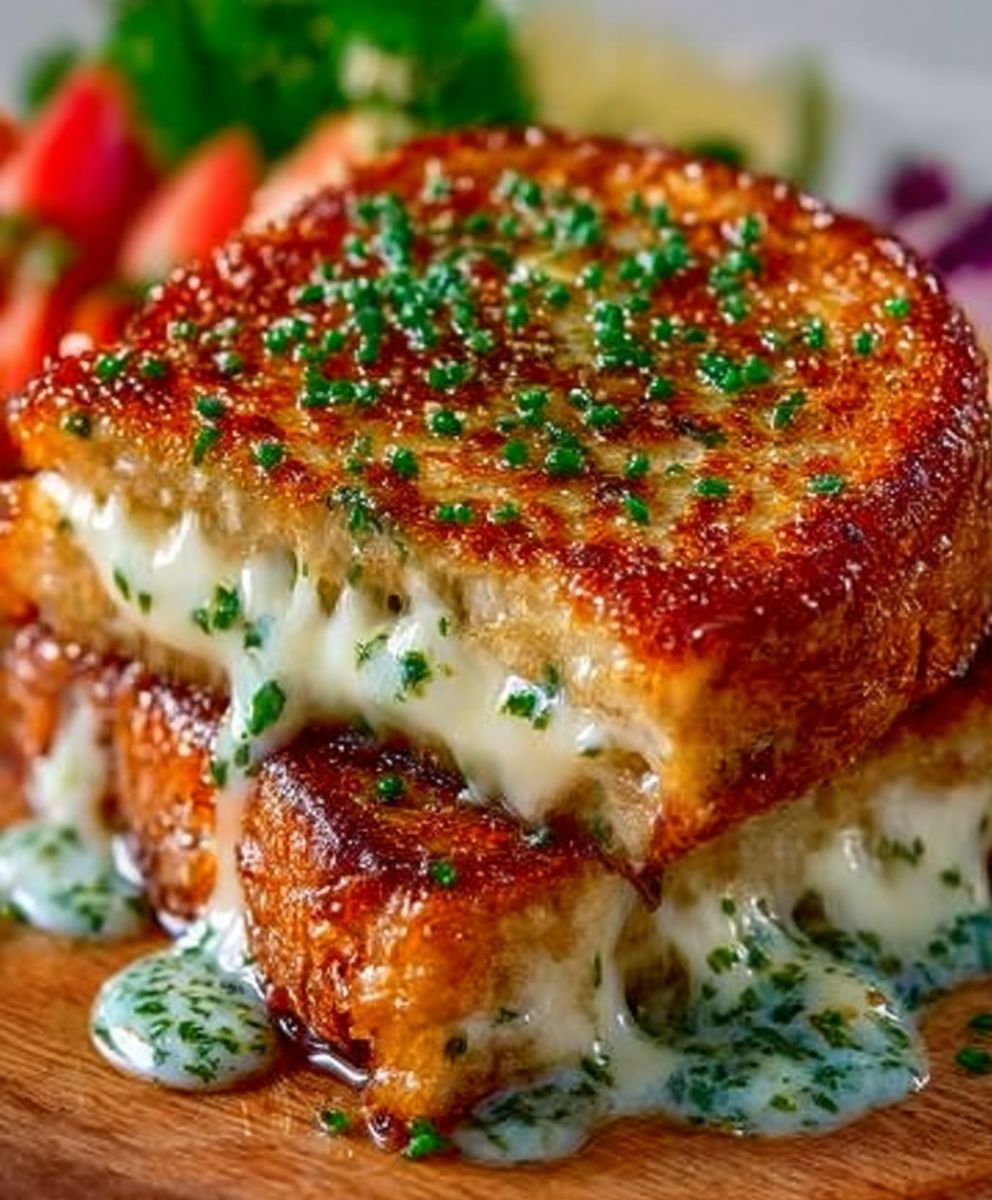
When selecting cheese for a proper melt, you must consider both flavor complexity and melting point. High-moisture, medium-fat cheeses are your best friends here. Sharp cheddar provides the necessary tang and depth, giving the sandwich that classic, comforting profile. However, cheddar alone can sometimes break when melted, releasing oil and leaving a gritty texture. This is where the supporting cast comes in. Combining cheddar with a creamy, stretchy cheese like provolone or low-moisture mozzarella is the professional move. Provolone melts beautifully, acting as the structural adhesive that guarantees the perfect, Instagram-worthy pull. Always shred your own cheese if possible; pre-shredded varieties contain anti-caking agents that hinder a smooth, effortless melt.
The Importance of Low and Slow Grilling
The phrase “low and slow” is usually reserved for smoking beef brisket or simmering stews, but it holds vital significance here. Place your buttered sandwich in a cold pan first, then turn the heat to medium-low. This gradual heating process allows the heat to penetrate the cheese fully before the bread has a chance to burn. Cover the pan with a lid for the first three minutes on each side. The lid traps steam, which softens the bread and helps the internal temperature rise quickly, accelerating the melting process without overheating the exterior. Flip the sandwich only once, cooking each side until it reaches a deep, irresistible golden brown, usually about 4 to 5 minutes per side. Resist the urge to press down aggressively; gentle pressure is okay, but squashing the sandwich will only force out the precious butter and cheese, leading to a dry, flat result. This patience is what transforms a simple hot sandwich into the ultimate lunch experience.
This technique is non-negotiable for achieving the truly legendary status of thisGarlic Bread Grilled Cheese 🍞🧀 | The Ultimate 15-Min Lunch You’ll Crave Every Day. By respecting the temperature and respecting the cheese, you honor the sandwich gods. Once you hear that glorious sizzle and smell the combination of toasted garlic and melting cheese, you will know you are moments away from pure bliss. This sandwich is so satisfying that it often sparks spontaneous applause from bystanders, or at least a highly dramatic sigh of contentment. If you are serving this for dinner, pair it with a refreshing side salad dressed with a bright lemon vinaigrette to cut through the richness. If it’s strictly a comfort lunch, dipping it into a warm bowl of creamy tomato basil soup is mandatory. Remember, this recipe isn’t just about making food; it’s about crafting an unforgettable moment of cheesy, garlicky indulgence.
Ingredients for Garlic Bread Grilled Cheese 🍞🧀 | The Ultimate 15-Min Lunch You’ll Crave Every Day
Here’s what you’ll need to make this delicious dish:
- Bread SlicesUse a sturdy, medium-thick bread like sourdough or brioche; avoid thin sandwich bread that might get soggy under the weight of the butter and cheese.
- Unsalted ButterThis forms the base of the garlic spread; using unsalted butter allows you to fully control the overall seasoning of the sandwich.
- Fresh GarlicFinely minced, fresh garlic provides the essential pungent, savory flavor; avoid garlic powder for this step as it lacks the necessary punch.
- Dried ParsleyAdded for visual appeal and a subtle herbal note, dried parsley should be mixed directly into the garlic butter spread.
- Sharp Cheddar CheeseShredded cheddar offers a wonderful tang and depth of flavor that is necessary for the traditional grilled cheese profile.
- Provolone CheeseThis cheese is selected for its superior melting capabilities, ensuring a smooth, stretchy, and gooey interior when combined with the cheddar.
- Pinch of Salt and Black PepperUsed to season the garlic butter mixture to enhance the overall savory notes of the final grilled product.
The full ingredients list, including measurements, is provided in the recipe card directly below.
How to Make Garlic Bread Grilled Cheese 🍞🧀 | The Ultimate 15-Min Lunch You’ll Crave Every Day
Follow these simple steps to prepare this delicious dish:
Step 1: Prepare the Garlic Butter Spread
In a small mixing bowl, combine the softened unsalted butter, freshly minced garlic, dried parsley, and a small pinch of salt and pepper. Stir the mixture thoroughly until all components are evenly distributed and the spread is uniform in color and texture. This potent mixture is the heart of the sandwich’s flavor.
Step 2: Assemble the Sandwich Base
Generously spread the garlic butter mixture onto one side of each slice of bread, ensuring the butter covers the entire surface right to the edges. This buttered side will be the exterior that touches the pan, resulting in the irresistible, garlicky crust. Flip two of the slices butter-side down for assembly.
Step 3: Layer the Cheeses
On the non-buttered side of the two slices currently facing up, distribute half of the shredded sharp cheddar and half of the provolone evenly. Top this first layer with the remaining slices of bread, then layer the rest of the cheddar and provolone on top of those. Finally, place the last two slices of bread, butter-side up, completing the sandwich.
Step 4: Begin the Grilling Process
Place the assembled sandwich(es) in a large, cold, non-stick skillet. Turn the stove heat to medium-low. Cooking from a cold pan allows the heat to increase gradually, ensuring the cheese melts completely before the bread burns. Cook undisturbed for approximately 4 to 5 minutes.
Step 5: Trap the Heat and Achieve the Perfect Melt
After the first 4 minutes, check the underside for a deep golden-brown color. Carefully flip the sandwich using a wide spatula. Immediately cover the pan with a lid for the next 3 minutes to trap the heat and steam, assisting the cheese in achieving that perfect, molten state.
Step 6: Finish and Serve
Remove the lid and continue cooking for 1 to 2 more minutes, until the second side is perfectly crisp and golden brown. The cheese should be completely melted and oozing slightly from the sides. Transfer the ultimateGarlic Bread Grilled Cheese 🍞🧀to a cutting board, slice diagonally (the only acceptable way), and serve immediately while the cheese is at its peak molten glory. Transfer to plates and drizzle with sauce for the perfect finishing touch.
Let’s be honest: the classic grilled cheese is comforting, but after a while, it starts feeling like the beige wallpaper of the lunch world. It gets boring. I spent years trying to elevate it—adding weird cheeses, fancy mustards, or even layering thinly sliced potatoes (don’t ask)—but nothing truly stuck until the moment sheer laziness met pantry desperation. What if we took the intoxicating aroma and savory punch of good homemade garlic bread and fused it with the gooey, melt-in-your-mouth experience of the ultimate cheese sandwich? Friends, I present to you theGarlic Bread Grilled Cheese, a recipe so simple, so aggressively delicious, that it will permanently redefine your expectations for midday meals. This creation is crunchy, pungent, cheesy, and requires only 15 minutes of your precious time. It’s not just a lunch; it’s a commitment to immediate culinary joy.
The Accidental Discovery of Sunshine on a Plate
It was a Tuesday—the culinary equivalent of beige—when I ran out of butter for my standard grilled cheese. Desperate, I grabbed the leftover roasted garlic butter intended for pasta night. The resulting sizzle and aroma were shocking. That humble error gave birth to the ultimate 15-minute lunch, a true plate of sunshine.
The Anatomy of Pure Crunch: Ingredients You Need
The beauty of this recipe lies in its simplicity. We are not messing with complex sauces or high-maintenance steps. We focus on high-quality components that deliver maximum flavor payoff with minimal effort. Remember, the bread is just as important as the cheese—it acts as the vessel for our glorious garlic spread and needs enough structure to hold up to the pan-frying.
- Bread:4 slices of thick-cut sourdough or Texas toast. Sourdough offers a great tang that cuts through the richness of the garlic and cheese.
- Cheese Blend:4 ounces of sharp cheddar, grated, and 2 ounces of low-moisture mozzarella, grated. The cheddar delivers flavor; the mozzarella delivers that satisfying, stretchy pull.
- Unsalted Butter:4 tablespoons, softened to room temperature.
- Garlic:2 cloves, minced finely. You can roast them first for a sweeter, milder flavor if time allows, but raw minced garlic provides the best pungency here.
- Dried Herbs:1/2 teaspoon dried parsley and 1/4 teaspoon dried oregano. These herbs provide the classic Italian garlic bread aroma.
- Salt and Pepper:A pinch of each for seasoning the spread.
Crafting the Ultimate Garlic Spread
The foundation of this sandwich is the spread. Do not skip the room-temperature softening step; cold butter makes mixing difficult and leads to uneven application. In a small bowl, combine the softened butter, finely minced garlic, dried parsley, dried oregano, salt, and pepper. Use a fork to smash and mix until the garlic and herbs are evenly incorporated throughout the butter. You are aiming for a fragrant, creamy paste. Taste a tiny bit to ensure the seasoning is spot on before proceeding.
This spread is highly versatile. I often make a double batch and keep it stored in the fridge just for emergency sandwich or steak situations. If you are preparing the spread ahead of time, make sure to let it sit out for about 15 minutes before using it to ensure it’s pliable enough for spreading without tearing the bread.
Step-by-Step: Building and Frying Your Masterpiece
We are going for maximum golden crust and internal melt. Pay close attention to your heat setting; this is where most amateur grilled cheese makers stumble, rushing the process and ending up with burnt bread and cold cheese. Patience is key when crafting the ultimate sandwich.
- Take two slices of bread and spread a thin layer of the garlic mixture on one side of each slice. This will be the outer, crispy side.
- Flip those two slices over. On the interior sides, pile on your grated cheese blend, ensuring the cheese is spread evenly edge-to-edge.
- Take the remaining two slices of bread. Spread a thin layer of plain, softened butter or mayo (for even crispier results) on the outside of these slices, and place them on top of the cheese pile, butter-side-up. You now have two complete, uncooked sandwiches.
- Heat a heavy-bottomed skillet (cast iron is ideal) over medium-low heat. This low temperature is vital for slow cooking.
- Place the sandwiches, garlic-buttered side down, onto the hot skillet. Cover the pan loosely with a lid or a sheet pan for the first three minutes. This creates steam, helping the cheese melt faster and more evenly.
- After 3 to 4 minutes, check the crust. It should be deep golden brown. Flip the sandwiches and continue cooking, pressing down gently with a spatula, until the second side is equally golden and the cheese is completely melted and gooey. This usually takes another 3 to 4 minutes.
- Remove from the pan, let it rest for one minute—this prevents all the cheese from escaping when you slice it—and then slice diagonally. Serve immediately with a side of warm tomato soup or even just a big, dramatic sigh of contentment.
Perfecting the Cooking Process
Achieving the perfect melt-to-crunch ratio is crucial. Start by mixing your garlic spread ahead of time. Next, assemble the sandwich quickly, then cook low and slow on medium-low heat. This ensures the cheese melts completely before the bread turns dark brown or burns.
The Secret Weapon: The Cheese Blend
Using a combination of cheeses, rather than just one type, elevates the entire experience. Cheddar brings the sharp, familiar flavor profile we associate with comfort food, while mozzarella offers stretch and moisture. If you prefer a nuttier profile, consider adding a touch of grated Gruyère or even some sharp Provolone. However, steer clear of overly high-moisture cheeses like fresh mozzarella, as they tend to release too much water and make the interior soggy. We are striving for gooey, not swampy.
Another often overlooked tip is to grate your own cheese. Pre-shredded cheeses contain cellulose or potato starch (anti-caking agents) that prevent them from melting smoothly. If you want that flawless, luxurious cascade of melted dairy, take the extra minute to shred a block yourself. Trust me; your taste buds will thank you for the minimal effort involved.
Add Your Touch
Elevate your sandwich with easy substitutions. Swap mozzarella for cheddar, or add a thin layer of roasted red peppers for a savory kick. For a sharper flavor, try incorporating dried oregano into the garlic butter mixture. Don’t be afraid to experiment!
Fantastic Customizations and Flavor Boosts
Once you’ve mastered the basicGarlic Bread Grilled Cheese, the fun begins with customization. This recipe is a fantastic canvas for adding extra flavor dimensions, depending on what you have lurking in your fridge.
- Spice It Up:Add a pinch of cayenne pepper or a thin layer of hot pepper jelly to the inside of the sandwich before cooking. The sweet heat works wonderfully with the savory garlic.
- Protein Power:For a heartier meal, tuck a thin layer of shredded chicken breast (pre-cooked, of course) or thinly sliced roast beef inside. Make sure the protein is fully warmed through during the cooking process.
- The Umami Bomb:Mix a teaspoon of finely mashed roasted mushrooms or a tiny dash of vegetarian Worcestershire sauce into the garlic spread for a deep, earthy flavor that complements the strong cheese.
- Herb Swaps:Replace the dried parsley and oregano with fresh chopped chives and thyme for a more sophisticated, earthy profile.
Remember that when adding moist ingredients like roasted vegetables or condiments, it is crucial to balance them with the dry ingredients. Excess moisture can make the bread soggy, even with the protective layer of garlic butter. Keep your fillings thin and spread evenly.
Storing & Reheating
This sandwich is best eaten immediately, but you can certainly prep the components. Store leftover garlic spread sealed tightly in the refrigerator for up to a week. To reheat a finished sandwich, use an air fryer or toaster oven for 3 minutes to regain maximum crunch.
Expert Culinary Tips for Maximum Crunch
- Always use freshly grated cheese; pre-shredded varieties contain anti-caking agents that hinder the smooth, decadent melt we are aiming for.
- Press the sandwich gently with a spatula while cooking. This maximizes contact with the pan and guarantees a beautifully even golden crust.
- If you find your spread too hard, gently microwave it for 10 seconds before applying. This ensures even spreading without tearing the bread.
My nephew, a notoriously picky eater, once declared this sandwich “better than pizza.” That unsolicited compliment validated every minute spent perfecting the crispy crust and gooey interior.
Conclusion for Garlic Bread Grilled Cheese 🍞🧀 | The Ultimate 15-Min Lunch You’ll Crave Every Day
We have successfully merged two icons of comfort food into a single, aggressively satisfying meal. The perfectGarlic Bread Grilled Cheese 🍞🧀 | The Ultimate 15-Min Lunch You’ll Crave Every Dayproves that simple recipes can still deliver complex, unforgettable flavor. By prioritizing fresh ingredients, managing your heat carefully, and embracing the glorious funk of roasted garlic, you transform the mundane lunchtime experience into a culinary event. Stop settling for plain melted cheese and embrace the crunch. This recipe is guaranteed to become a high-rotation classic in your kitchen, proving that sometimes, the best discoveries happen when you run out of regular butter.
Print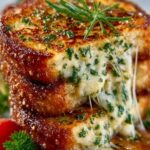
Garlic Bread Grilled Cheese 🍞🧀 | The Ultimate 15-Min Lunch You’ll Crave Every Day
- Total Time: 35 minutes
- Yield: 4 servings 1x
Description
Forget basic grilled cheese! This 15-min mashup uses fresh garlic, butter, and sharp cheddar for maximum gooey crunch. Craveable lunch perfection guaranteed. Full steps & nutrition included.
Ingredients
- 2 slices sandwich bread (e.g., sourdough or Texas toast)
- 4 tablespoons unsalted butter, divided
- 2 slices sharp cheddar or American cheese
- 1 large clove fresh garlic, minced very finely
- 1/2 teaspoon dried parsley flakes
- 1/4 teaspoon kosher salt
Instructions
- Step 1: Create the Garlic Butter Mixture
- Step 2: Prepare the Bread Slices
- Step 3: Assemble the Grilled Cheese
- Step 4: Grill the Sandwich
- Step 5: Melt the Cheese Through
Notes
- The prepared garlic butter mixture can be refrigerated in an airtight container for up to 5 days, making future 15-minute lunches even faster.
- To revive any leftovers, reheat slowly in a dry non-stick pan over medium-low heat until the cheese softens again—avoid the microwave to keep the crust crisp.
- For a perfect pairing, serve alongside a quick bowl of warm tomato soup or a small side of vinegar-based coleslaw to balance the sandwich’s savory richness.
- When mincing the fresh garlic, aim for a very fine paste, as larger pieces tend to brown and become bitter quickly when grilled in the hot butter.
- Prep Time: 15 minutes
- Cook Time: 20 minutes
- Method: Stovetop
- Cuisine: American
Nutrition
- Serving Size: 1 sandwich
- Calories: 535
- Sodium: 815mg
- Fat: 37g
- Saturated Fat: 21g
- Trans Fat: 0.5g
- Protein: 3g
Leave a Comment