
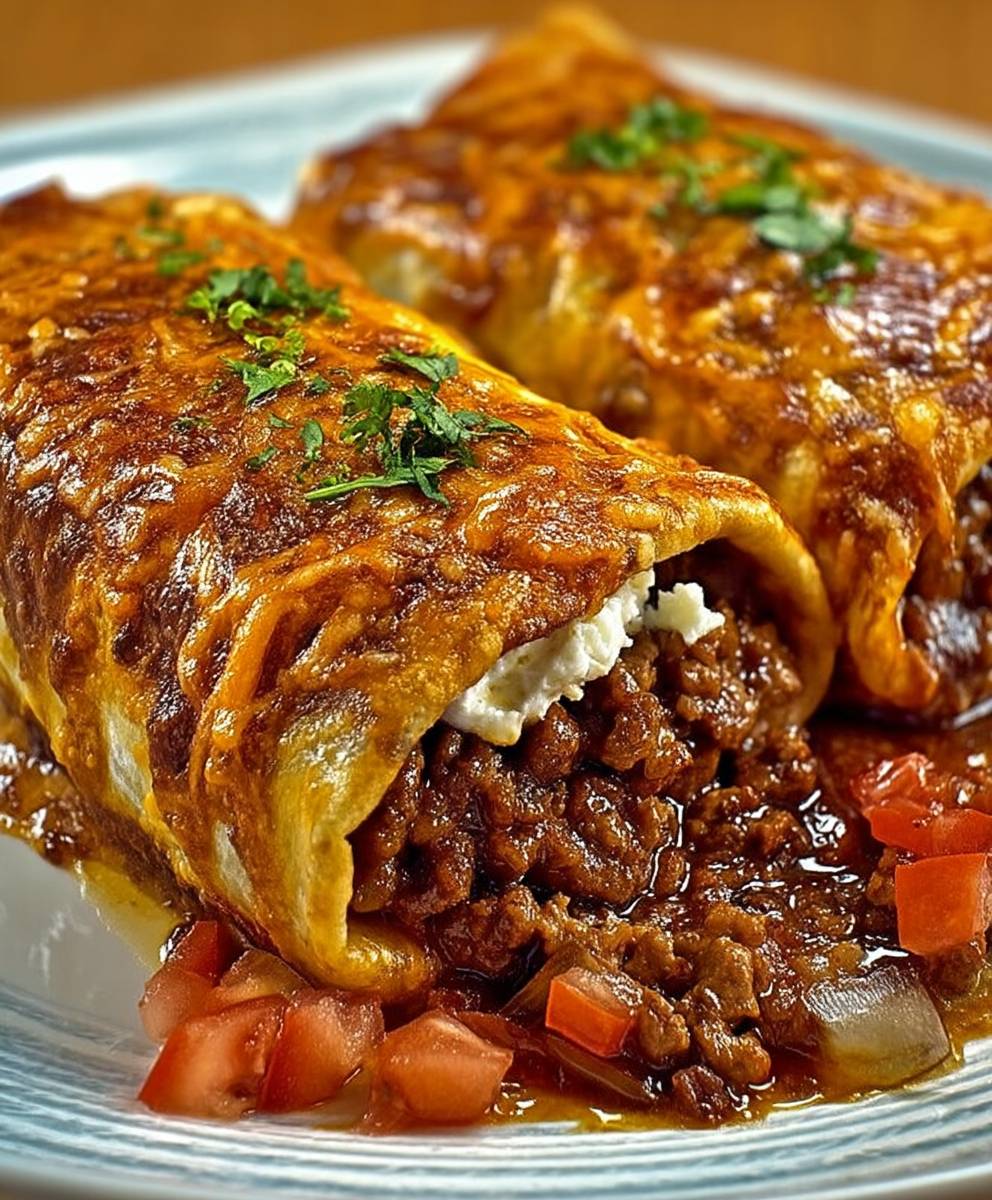
The aroma of sizzling beef and melted cheese truly beckons. Craving something crispy and utterly satisfying, the answer emerged: incredibleBeef and Cheese Chimichangas.
Imagine biting into a golden, crunchy tortilla, revealing warm, seasoned beef and gooey cheese. A flavor fiesta awaits!
Here are just a few reasons why you’ll adore this recipe:
- These delightful parcels combine rich, savory beef and gooey melted cheese, delivering an explosion of comforting flavors in every crispy bite.
- Surprisingly simple to assemble, these chimichangas transform everyday ingredients into a spectacular meal that’s perfect for busy weeknights.
- Their golden-brown exterior and vibrant filling make for an inviting presentation, sure to impress family and friends at any casual gathering.
- Whether you choose to bake or fry, these versatile chimichangas can be customized with various toppings, suiting any preference or occasion.
Unleashing the Magic of Beef and Cheese Chimichangas
There’s something inherently delightful about food that delivers a satisfying crunch followed by a warm, savory embrace. Chimichangas, those glorious deep-fried (or baked!) burritos, are champions of this culinary duality. They hail from the Sonoran Desert, specifically Arizona, where legend says a kitchen mishap turned a dropped burrito into an accidental, but incredibly delicious, fried marvel. Who knew clumsiness could lead to such gastronomic genius? Fast forward to today, and these crispy beef wraps have cemented their place as a beloved comfort food, a testament to the fact that sometimes, the best discoveries are happy accidents.
Crafting your ownBeef and Cheese Chimichangasat home is an adventure in flavor and texture. It’s an opportunity to create something truly spectacular from scratch, far surpassing any restaurant version you might find. Think about it: perfectly seasoned ground beef, mingling with fragrant spices, enveloped in a blanket of melted, stretchy cheese, all tucked inside a tortilla that gets wonderfully crisp. It’s a dish that promises pure satisfaction, whether you’re serving it up for a bustling family dinner, a casual get-together with friends, or simply treating yourself after a long day. The beauty lies in their versatility and the sheer joy they bring to the table.
Why These Beef and Cheese Chimichangas Will Become Your Go-To Recipe
Let’s be honest, we all have those recipes we keep tucked away, ready for any occasion. This recipe forBeef and Cheese Chimichangasis about to earn a coveted spot in your culinary hall of fame. Firstly, it’s deceptively easy. You don’t need a culinary degree or fancy equipment to whip these up. If you can brown ground beef and fold a tortilla, you’re halfway to chimichanga mastery! Secondly, the flavor profile is simply irresistible. The rich, savory beef, infused with aromatic spices, paired with generous amounts of gooey, melted cheese, creates a symphony in your mouth that is both comforting and exciting. It’s the kind of meal that makes you close your eyes and savor every single bite.
Beyond the incredible taste, these chimichangas offer a fantastic canvas for customization. Feeling a little extra heat? Add a pinch of cayenne pepper to the beef mixture. Want more veggie power? Toss in some finely diced bell peppers or corn. The possibilities are endless! Plus, they’re incredibly versatile in how you cook them. While traditional chimichangas are deep-fried to achieve that signature crunch, we’ll also provide an equally delicious baked option for a slightly lighter, less oil-intensive experience. Either way, you’ll end up with a golden-brown exterior that crackles with delight and a warm, tender interior that’s packed with flavor. So, clear your schedule, gather your ingredients, and prepare to embark on a delicious journey to make the best beef and cheese chimichangas you’ve ever tasted!
Ingredients for Beef and Cheese Chimichangas
Here’s what you’ll need to make this delicious dish:
- Ground BeefOpt for lean ground beef, about 80/20, to ensure a flavorful yet not overly greasy filling for your chimichangas. This forms the hearty base, providing substantial texture and rich savory notes.
- Yellow OnionFinely diced, a yellow onion provides a foundational sweetness and aromatic depth that complements the savory beef beautifully, creating a complex flavor base.
- Garlic ClovesFreshly minced garlic adds a pungent, irresistible aroma and sharp flavor that elevates the entire beef mixture, crucial for a truly delicious filling.
- Tomato PasteA small amount of tomato paste deepens the savoriness of the beef filling, adding a rich umami note without making it tomato-heavy, balancing the spices.
- Beef BrothUse a good quality beef broth to moisten the filling and infuse it with additional savory notes, ensuring a juicy and tender consistency that prevents dryness.
- CuminGround cumin is essential for that classic, warm, earthy flavor profile, giving your chimichangas an authentic touch that hints at their Tex-Mex inspiration.
- Chili PowderA blend of spices including chili powder adds a mild heat and a complex, smoky undertone that defines the savory filling, providing depth without overwhelming spice.
- Smoked PaprikaSmoked paprika contributes a beautiful color and a distinct smoky aroma, enhancing the overall depth of flavor in the beef and adding visual appeal.
- Salt and Black PepperThese fundamental seasonings are crucial for balancing and enhancing all the other flavors in the chimichanga filling, bringing everything into perfect harmony.
- Large Flour TortillasLarge, soft flour tortillas are the vessel for all the deliciousness, strong enough to hold the filling and crisp up beautifully, typically 10-inch size works best.
- Shredded Cheese BlendA mix of cheddar and Monterey Jack cheese offers the perfect melt, creating that irresistible gooey, stretchy texture inside each chimichanga. You can also use pepper jack for a little kick.
- Vegetable OilFor frying, a neutral oil like vegetable oil or canola oil is ideal, providing an even cook and a perfectly golden, crispy exterior. Alternatively, a non-stick cooking spray can be used for baking.
The full ingredients list, including measurements, is provided in the recipe card directly below.
How to Make Beef and Cheese Chimichangas
Follow these simple steps to prepare this delicious dish:
Step 1:Prepare the Savory Beef Filling
Heat a large skillet over medium-high heat. Add the ground beef and cook, breaking it apart with a spoon, until it is fully browned and no pink remains. This usually takes about 6-8 minutes. Drain any excess grease from the skillet thoroughly. Reduce the heat to medium, then add the diced yellow onion and cook until softened and translucent, about 5-7 minutes. Stir in the minced garlic, chili powder, cumin, smoked paprika, salt, and black pepper, cooking for another minute until fragrant, filling your kitchen with wonderful aromas. Add the tomato paste and beef broth, stirring well to combine all ingredients. Let the mixture simmer uncovered for 10-15 minutes, allowing the flavors to meld beautifully and the liquid to reduce slightly, creating a rich, thick filling. Remove from heat and set aside to cool slightly before assembling.
Step 2:Assemble Your Chimichangas Like a Pro
Lay a flour tortilla flat on a clean surface. For easier rolling and to make the tortillas more pliable, you can briefly warm them in the microwave for 10-15 seconds. Spoon about 1/3 cup of the cooled beef filling onto the center of the tortilla, leaving a border around the edges. This prevents overfilling and messy leaks. Sprinkle a generous amount of shredded cheese (about 1/4 cup) evenly over the beef filling. Fold the sides of the tortilla over the filling, then tightly roll it up from the bottom, creating a neat, compact package. Ensure the ends are tucked in securely and the seam is tight to prevent any filling from escaping during cooking. Repeat this process with the remaining tortillas, beef, and cheese mixture until all are assembled.
Step 3:Cook to Crispy Perfection: Fry or Bake
For frying: Pour about 1-2 inches of vegetable oil into a large, heavy-bottomed skillet or Dutch oven and heat to 350°F (175°C). Use a cooking thermometer to ensure accuracy. Carefully place 2-3 chimichangas into the hot oil, seam-side down first, being careful not to overcrowd the pan, which can lower the oil temperature. Fry for 2-4 minutes on each side, or until golden brown and crispy all over. They should have a beautiful, even color. Using tongs, carefully remove the cooked chimichangas and place them on a wire rack lined with paper towels to drain excess oil, ensuring maximum crispiness.
For baking: Preheat your oven to 400°F (200°C). Lightly spray both sides of the assembled chimichangas with non-stick cooking spray or brush with a thin layer of oil. Place them seam-side down on a baking sheet lined with parchment paper. Bake for 20-25 minutes, flipping them gently halfway through, until they are golden brown and deliciously crispy. This method provides a fantastic crunch with less oil.
Step 4:Serve with Delightful Toppings and Enjoy
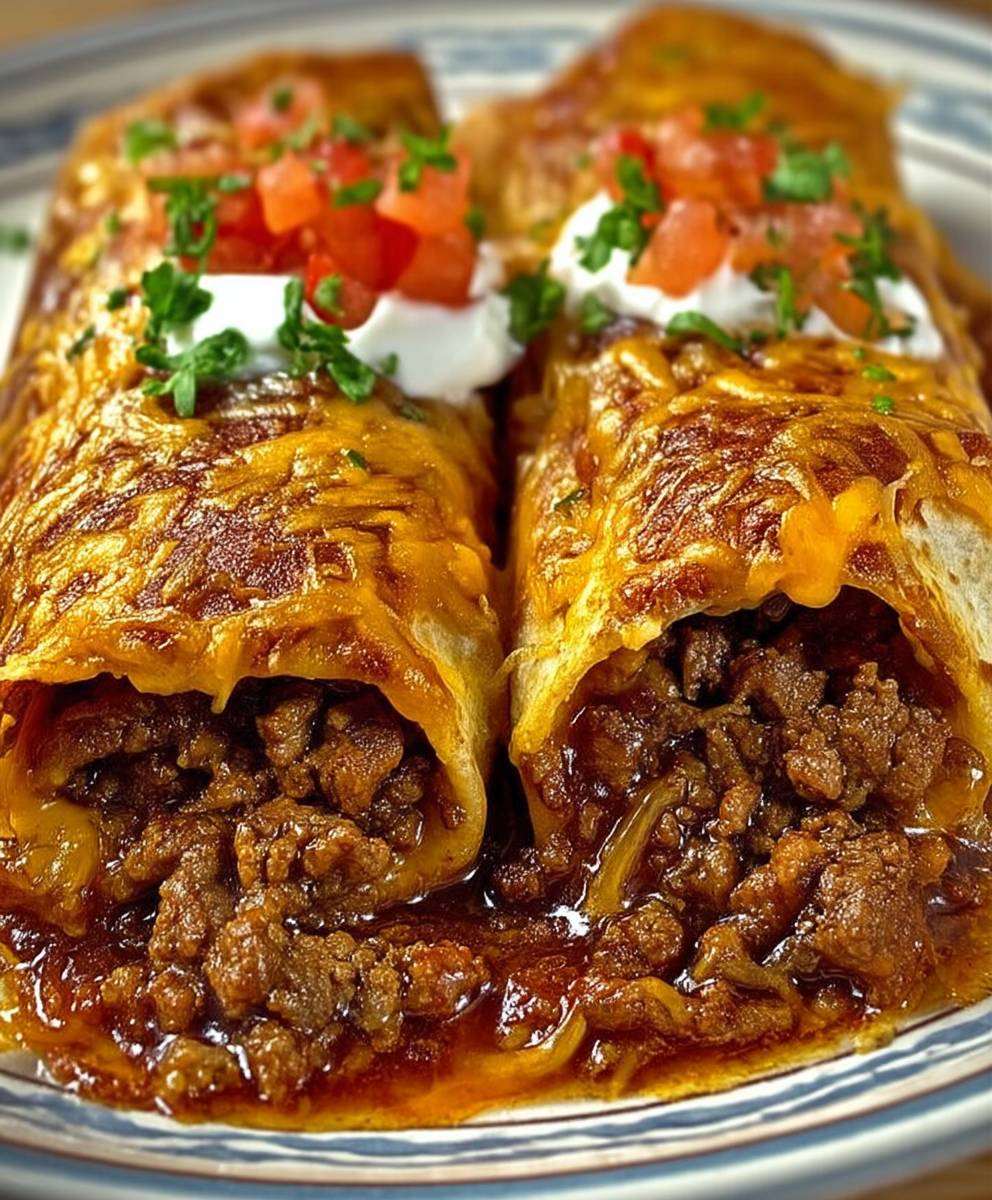
Once cooked, transfer the golden, crispyBeef and Cheese Chimichangasto plates. These are fantastic served immediately, while still warm and the cheese is delightfully gooey. Offer a selection of your favorite toppings such as a generous dollop of cool sour cream, fresh pico de gallo or vibrant salsa, creamy guacamole, or a sprinkle of fresh chopped cilantro. For an extra kick of heat, a drizzle of your preferred hot sauce can elevate them to a spicy sensation. Enjoy these warm, cheesy, and utterly satisfying bundles of joy with family and friends!
Tips and Tricks for the Best Beef and Cheese Chimichangas
Making truly outstanding chimichangas goes beyond just following the steps; a few clever tricks can elevate your dish from good to absolutely glorious. One crucial tip involves the beef filling: make sure it’s not too wet. After simmering, if there’s still a lot of liquid, let it reduce further, or drain any excess. A soggy filling leads to soggy chimichangas, and nobody wants that! Also, allow the beef mixture to cool slightly before assembling. Hot filling can make your tortillas tear and melt the cheese prematurely, leading to a much messier rolling process. Patience here is a virtue that pays off in neat, perfectly formed beef and cheese wraps.
Perfecting the Roll and the Fry
The art of rolling a perfect chimichanga is simpler than it seems. Don’t be afraid to fold those sides tightly and roll firmly. A loose roll means a messy chimichanga! If your tortillas feel stiff or prone to cracking, warm them slightly in the microwave for 10-15 seconds. This makes them much more pliable and cooperative. When frying, maintaining the correct oil temperature is paramount. Too cool, and your chimichangas will absorb too much oil, becoming greasy. Too hot, and they’ll brown too quickly on the outside while the inside remains less heated. A steady 350°F (175°C) is your sweet spot for that perfect golden-brown crispness. Don’t overcrowd the pan; fry them in batches to maintain consistent oil temperature and achieve even cooking. If baking, a light spray of oil on both sides will help achieve a beautiful, crispy exterior without the need for deep frying.
Serving Suggestions and Customizations
WhileBeef and Cheese Chimichangasare incredibly flavorful on their own, the right accompaniments can turn them into a full-blown feast. Beyond the classic sour cream, salsa, and guacamole, consider a side of vibrant Mexican rice or a simple black bean salad for a complete meal. For those who enjoy a little extra zing, a squeeze of fresh lime juice over the top just before serving can brighten all the flavors. Don’t be shy about experimenting with different cheese blends; a mix of colby jack, provolone, or even a spicy pepper jack can add new dimensions. You can also sneak in some finely diced vegetables like bell peppers or corn into the beef mixture for added nutrients and texture. These crispy beef pockets are incredibly forgiving and open to your creative whims, making every batch a unique experience!
Frequently Asked Questions About Beef and Cheese Chimichangas
Can I prepare Beef and Cheese Chimichangas ahead of time?
Absolutely! You can prepare the beef filling a day or two in advance and store it in an airtight container in the refrigerator. You can also assemble the chimichangas up to a few hours before cooking. Place them on a baking sheet, cover loosely with plastic wrap, and refrigerate. This makes them perfect for busy weeknights or entertaining.
What if I don’t want to fry them?
No problem at all! As mentioned in the recipe, baking is an excellent alternative. Simply preheat your oven to 400°F (200°C), lightly spray the assembled chimichangas with non-stick cooking spray, and bake for 20-25 minutes, flipping halfway, until golden and crispy. They will still be delicious and satisfying!
Can I freeze these Beef and Cheese Chimichangas?
Yes, you can! To freeze, prepare the chimichangas as instructed, but do not cook them. Place the uncooked chimichangas in a single layer on a baking sheet and freeze until solid. Once frozen, transfer them to a freezer-safe bag or container. They can be stored for up to 2-3 months. When ready to cook, bake them directly from frozen at 400°F (200°C) for 30-40 minutes, or fry until heated through and golden.
What are some good dipping sauces for chimichangas?
Beyond the classic sour cream and salsa, try a zesty cilantro-lime crema, a creamy avocado ranch, or a smoky chipotle aioli. A simple warm cheese sauce also makes a decadent addition. Experiment with different sauces to find your perfect pairing!
Can I substitute the ground beef?
Certainly! While this recipe focuses on our deliciousBeef and Cheese Chimichangas, you can easily substitute ground turkey or ground chicken for a different flavor profile. Just ensure any poultry is cooked through and seasoned well. The cooking times for the meat may vary slightly.
Conclusion: Your New Favorite Crispy Creation
And there you have it, folks – a journey through the delightful world of homemadeBeef and Cheese Chimichangas! From a simple craving to a kitchen full of tantalizing aromas, this recipe promises to deliver not just a meal, but an experience. We’ve covered everything from selecting the best ingredients to mastering the perfect roll, and even offering tips for baking versus frying, ensuring you achieve that coveted golden crispness every single time. These savory pockets of joy are more than just food; they’re an invitation to gather, to share, and to savor the simple pleasures of a truly fantastic homemade dish.
So, next time your stomach starts rumbling for something extraordinary, bypass the takeout menus and head straight for your kitchen. With this recipe in hand, you’re ready to conquer that craving and emerge victorious, armed with a plate of the most incredible crispy beef and cheese wraps you’ve ever tasted. Don’t hesitate to get creative with your toppings and sides, making each serving uniquely yours. Happy cooking, and may your chimichangas always be perfectly golden, gloriously cheesy, and utterly unforgettable!
Perfecting the Cooking Process
For ultimate efficiency and flawless results with your beef and cheese chimichangas, first brown the ground beef and sauté the aromatics. While the savory filling simmers to perfection, take a moment to warm your tortillas, making them perfectly pliable for wrapping. This sequential approach ensures everything comes together smoothly, guaranteeing hot, fresh, and perfectly crispy chimichangas.
Add Your Touch
Feel free to get creative with your chimichangas! Swap Monterey Jack for sharp cheddar or a fiery pepper jack for extra zing. Add cooked black beans or corn to the filling for more texture. A splash of lime juice to the finished beef mixture brightens the flavors beautifully. Don’t be shy about experimenting with your favorite spices!
Storing & Reheating
To keep leftover chimichangas delicious, store them in an airtight container in the refrigerator for up to 3 days. Reheat baked chimichangas in the oven at 350°F (175°C) for 10-15 minutes until warmed through and crispy. Fried ones can be crisped up in an air fryer or a hot skillet.
I remember serving these beef and cheese chimichangas at a casual family get-together, and my notoriously picky cousin, who usually just picks at his food, devoured two in minutes, declared them “genius,” and asked for the recipe. It was a true victory!
-
Don’t overfill your tortillas; a modest amount of filling ensures easier wrapping and prevents blowouts during cooking, keeping your chimichangas intact and beautiful.
-
Ensure your frying oil is at the correct temperature (350-375°F). Too cool, and your chimichangas will be greasy; too hot, and they’ll burn before cooking through.
-
After frying, immediately place chimichangas on a wire rack, not paper towels directly. This allows air circulation, preventing the bottom from getting soggy.
Unveiling the Legendary Beef and Cheese Chimichangas
Ah, the chimichanga! If you’ve ever found yourself staring into the fridge, pondering the meaning of life and what glorious culinary creation could truly satisfy your soul, chances are a crispy, golden-brown chimichanga has crossed your mind. It’s not just a meal; it’s an experience. A delightful package of savory beef, gooey cheese, and an explosion of flavor, all wrapped in a tortilla and cooked to crunchy perfection. Forget your troubles, grab a fork, and prepare for a journey to deliciousness. Making these at home is surprisingly fun, and frankly, far superior to any takeout version. Imagine that aroma filling your kitchen – that’s the smell of pure joy.
There’s something inherently thrilling about a dish that promises both crunch and creamy, savory satisfaction in every bite. Our journey to master the perfect chimichanga began with a simple craving and a strong belief that comfort food doesn’t have to be complicated to be utterly divine. These golden parcels of joy are more than just a recipe; they are an invitation to create a memorable feast, right in your own kitchen. Whether you’re feeding a crowd for game night or simply treating yourself after a long week, these crispy cheesy delights are guaranteed to bring smiles and satisfied sighs. We’re talking about tender, seasoned beef mingling with melted cheese, all encased in a tortilla that sings with crispiness. It’s a symphony of textures and tastes that will make your taste buds dance the tango.
Your Arsenal of Ingredients for Epic Chimichangas
Before we embark on this culinary adventure, let’s ensure our pantry is stocked with all the necessary heroes. Quality ingredients make all the difference, transforming a simple dish into something truly extraordinary. Don’t skimp on the fresh produce or the good quality beef; your taste buds will thank you profusely. This list ensures you have everything required to create a batch of incredibly delicious fried burritos that will have everyone asking for seconds.
For the Savory Beef Filling:
- 1 tablespoon olive oil or other cooking oil
- 1.5 pounds ground beef (80/20 lean preferred for flavor)
- 1 large onion, finely chopped
- 2 cloves garlic, minced
- 1 (15-ounce) can diced tomatoes, undrained
- 1 (4-ounce) can mild green chilies, diced (undrained)
- 1 teaspoon ground cumin
- 1 teaspoon chili powder
- 1/2 teaspoon smoked paprika
- 1/4 teaspoon cayenne pepper (optional, for a little kick)
- Salt and freshly ground black pepper to taste
- 1 cup beef broth or vegetable broth
For the Crispy Chimichangas:
- 12 large flour tortillas (burrito size, about 10-12 inches)
- 2 cups shredded Monterey Jack cheese (or a Mexican blend)
- Oil for frying (vegetable, canola, or sunflower oil)
Optional Toppings (because why not?):
- Sour cream or plain Greek yogurt
- Fresh salsa or pico de gallo
- Guacamole or sliced avocado
- Chopped fresh cilantro
- Lime wedges
Step-by-Step: Crafting Your Masterpiece Beef and Cheese Chimichangas
Now for the exciting part! This step-by-step guide will walk you through creating these fantastic beef and cheese chimichangas. Don’t worry, it’s simpler than it sounds, and the results are truly worth every moment. We’ll conquer the filling, master the art of wrapping, and achieve that perfect golden crisp. Get ready to transform humble ingredients into a spectacular meal that will impress even the toughest food critics (your family, probably).
Step 1: Prepare the Hearty Beef Filling
Heat the olive oil in a large skillet or Dutch oven over medium heat. Add the ground beef and cook, breaking it up with a spoon, until it’s browned and cooked through. Drain any excess fat. This ensures your chimichangas aren’t greasy. Next, add the chopped onion to the skillet and sauté until it softens, about 5 minutes. Stir in the minced garlic and cook for another minute until fragrant. Don’t let it burn; burnt garlic is a sad, bitter affair.
Now, it’s time to introduce the flavor powerhouses. Add the diced tomatoes (undrained), green chilies (undrained), ground cumin, chili powder, smoked paprika, and cayenne pepper (if using). Season generously with salt and black pepper. Pour in the beef broth. Bring the mixture to a simmer, then reduce the heat to low, cover, and let it cook for at least 15-20 minutes. This simmering time allows all those magnificent flavors to meld beautifully, creating a rich, deeply satisfying filling that is the soul of your savory beef pockets. Stir occasionally to prevent sticking.
Step 2: Assemble Your Magnificent Chimichangas
Once your filling is ready, remove it from the heat and let it cool slightly. Warm your tortillas gently in the microwave for about 15-20 seconds or in a dry skillet for a few seconds per side. This makes them pliable and prevents tearing when you fold them. Lay a warm tortilla flat on a clean surface. Spoon about 1/3 to 1/2 cup of the beef filling onto the center of the tortilla, leaving space around the edges. Sprinkle about 2 tablespoons of shredded cheese over the filling. Resist the urge to overfill; less is often more when it comes to wrapping these delicious parcels.
To wrap, fold the bottom edge of the tortilla up over the filling. Then, fold in the sides, snugly tucking them over the filling. Finally, roll the entire thing up tightly from the bottom to create a neat, secure package. You can use a tiny dab of water on the top edge to seal it if needed, like edible glue. Repeat with the remaining tortillas and filling. You’ll become a wrapping pro in no time, trust me.
Step 3: Cook to Golden Perfection
You have two fantastic options here: frying or baking. Both yield delicious results for your homemade chimichangas, just with slightly different textures.
Option A: The Classic Fry
Pour about 1-2 inches of oil into a large, heavy-bottomed pot or deep skillet. Heat the oil to 350-375°F (175-190°C). If you don’t have a thermometer, a small piece of tortilla should sizzle immediately when dropped in. Carefully place 1-2 chimichangas seam-side down into the hot oil, being careful not to overcrowd the pan. Fry for 2-4 minutes per side, or until they are beautifully golden brown and crispy. Use tongs to turn them gently. Once cooked, remove the chimichangas from the oil and place them on a wire rack set over paper towels to drain any excess oil. This keeps them wonderfully crisp.
Option B: The Baked Alternative
Preheat your oven to 400°F (200°C). Lightly spray a baking sheet with cooking spray. Brush each assembled chimichanga lightly with oil (this helps with crispiness). Arrange them on the prepared baking sheet. Bake for 20-25 minutes, flipping them halfway through, until they are golden brown and heated through. While they won’t have the deep fry crisp, they’ll still be incredibly flavorful and satisfying. Plus, less oil, less mess!
Serve your glorious beef and cheese chimichangas immediately with your favorite toppings. Get ready for a chorus of “Mmmms” and “Ahhhs.”
Frequently Asked Questions About Chimichangas
Can I prepare Beef and Cheese Chimichangas ahead of time?
Absolutely! You can prepare the beef filling a day or two in advance and store it in the refrigerator. You can also assemble these delightful beef pockets, place them on a baking sheet, cover them tightly with plastic wrap, and refrigerate for up to 24 hours before cooking. This makes entertaining a breeze!
What is the best way to get crispy chimichangas without deep frying?
Baking them with a light brush of oil will give a decent crisp, but for truly impressive crispiness without deep frying, consider an air fryer. Brush the assembled chimichangas with a little oil and air fry at 375°F (190°C) for 10-15 minutes, flipping halfway, until golden and crunchy.
Can I freeze these Beef and Cheese Chimichangas?
Yes, you can! Assemble the chimichangas, but do not cook them. Place them in a single layer on a baking sheet and freeze until solid. Once frozen, transfer them to a freezer-safe bag or container. They can be frozen for up to 2-3 months. When ready to cook, bake them directly from frozen, increasing the baking time slightly for the best results.
What kind of tortillas should I use for chimichangas?
Large flour tortillas, typically labeled “burrito size” (about 10-12 inches), are ideal. Their size allows for ample filling, and their pliability when warmed makes them easy to fold without tearing. Corn tortillas are not recommended as they tend to crack when folded and fried, leading to a messy situation.
How do I prevent my chimichangas from falling apart while frying?
The key is a tight wrap and ensuring the seam side goes down first into the hot oil. Also, do not overfill the tortillas. If the seam doesn’t hold, you can secure it with a toothpick, just remember to remove it before serving. Warming the tortillas beforehand also greatly helps with pliability and prevents cracking.
Get Ready to Devour!
There you have it – a comprehensive guide to creating the most incredible beef and cheese chimichangas right in your own kitchen. From the sizzle of the beef to the satisfying crunch of that golden tortilla, every step is a celebration of flavor and fun. This recipe isn’t just about cooking; it’s about sharing joy, creating memories, and proving that with a little effort and a lot of love, you can bring restaurant-quality deliciousness to your dining table. So go forth, embrace your inner chef, and prepare to be amazed by these savory, cheesy, and utterly irresistible delights. Happy cooking, fellow food adventurers!
Conclusion for Beef and Cheese Chimichangas
Wrapping up our culinary adventure, these homemade Beef and Cheese Chimichangas truly deliver a fiesta of flavors and textures. We’ve discovered the joy of a perfectly seasoned, succulent beef filling, encased in a golden, crispy tortilla – all achievable without the deep-fryer drama! Whether you’re planning a casual family dinner or a vibrant gathering with friends, these chimichangas offer a satisfyingly delicious and surprisingly approachable meal. Remember, the secret lies in quality ingredients and a sprinkle of enthusiasm. So, go forth, embrace the sizzle, and prepare to delight everyone with your magnificent Beef and Cheese Chimichangas. It’s a dish that promises big smiles and empty plates!
Print
Beef and Cheese Chimichangas
- Total Time: 35 minutes
- Yield: 4 servings
Description
Master delicious Beef and Cheese Chimichangas! Our recipe combines lean ground beef, vibrant onion, fresh garlic, and rich beef broth into a hearty, savory filling.
Ingredients
- Ground BeefOpt for lean ground beef, about 80/20, to ensure a flavorful yet not overly greasy filling for your chimichangas. This forms the hearty base, providing substantial texture and rich savory notes.
- Yellow OnionFinely diced, a yellow onion provides a foundational sweetness and aromatic depth that complements the savory beef beautifully, creating a complex flavor base.
- Garlic ClovesFreshly minced garlic adds a pungent, irresistible aroma and sharp flavor that elevates the entire beef mixture, crucial for a truly delicious filling.
- Tomato PasteA small amount of tomato paste deepens the savoriness of the beef filling, adding a rich umami note without making it tomato-heavy, balancing the spices.
- Beef BrothUse a good quality beef broth to moisten the filling and infuse it with additional savory notes, ensuring a juicy and tender consistency that prevents dryness.
- CuminGround cumin is essential for that classic, warm, earthy flavor profile, giving your chimichangas an authentic touch that hints at their Tex-Mex inspiration.
- Chili PowderA blend of spices including chili powder adds a mild heat and a complex, smoky undertone that defines the savory filling, providing depth without overwhelming spice.
- Smoked PaprikaSmoked paprika contributes a beautiful color and a distinct smoky aroma, enhancing the overall depth of flavor in the beef and adding visual appeal.
- Salt and Black PepperThese fundamental seasonings are crucial for balancing and enhancing all the other flavors in the chimichanga filling, bringing everything into perfect harmony.
- Large Flour TortillasLarge, soft flour tortillas are the vessel for all the deliciousness, strong enough to hold the filling and crisp up beautifully, typically 10-inch size works best.
- Shredded Cheese BlendA mix of cheddar and Monterey Jack cheese offers the perfect melt, creating that irresistible gooey, stretchy texture inside each chimichanga. You can also use pepper jack for a little kick.
- Vegetable OilFor frying, a neutral oil like vegetable oil or canola oil is ideal, providing an even cook and a perfectly golden, crispy exterior. Alternatively, a non-stick cooking spray can be used for baking.
Instructions
- Step 1:Prepare the Savory Beef Filling
- Step 2:Assemble Your Chimichangas Like a Pro
- Step 3:Cook to Crispy Perfection: Fry or Bake
- Step 4:Serve with Delightful Toppings and Enjoy
Notes
- For future meals, assemble your chimichangas and freeze them uncooked on a baking sheet, then transfer to a freezer bag; cook directly from frozen, adding a few extra minutes to the cooking time.
- To revive that delicious crispy texture, reheat chilled chimichangas in an air fryer at 350°F (175°C) for 8-10 minutes or in a preheated oven at 375°F (190°C) until golden and heated through.
- Elevate your chimichangas with a generous dollop of cool sour cream or vibrant guacamole, a side of fresh pico de gallo, and a sprinkle of chopped cilantro for a true Tex-Mex feast.
- To guarantee a perfectly crispy chimichanga, make sure your beef filling is well-reduced and not overly wet before wrapping, as excess moisture can prevent the tortilla from achieving that ideal golden crunch.
- Prep Time: 15 minutes
- Cook Time: 20 minutes
- Method: Stovetop
- Cuisine: American
Nutrition
- Serving Size: 1 large chimichanga (approx. 350g)
- Calories: 780
- Sodium: 1400mg
- Fat: 52g
- Saturated Fat: 20g
- Trans Fat: 0.5g
- Protein: 4g
FAQs
What makes these homemade Beef and Cheese Chimichangas so special?
Our Beef and Cheese Chimichangas stand out because they perfectly balance savory ground beef, seasoned with a delightful blend of spices, and gooey, melt-in-your-mouth cheese, all wrapped in a crispy tortilla. Unlike their fried counterparts, these are often baked or air-fried to a golden perfection, offering that satisfying crunch without the extra oil. It’s a hearty, flavorful meal that’s surprisingly easy to whip up and brings a festive, comforting vibe to any dinner table. The combination of textures and robust flavors truly makes this dish a standout.
Can I prepare the filling for chimichangas in advance?
Absolutely! Preparing the savory beef and cheese filling ahead of time is a fantastic strategy for meal planning and makes assembly a breeze. Simply cook your seasoned ground beef mixture according to the recipe, let it cool completely, and then store it in an airtight container in the refrigerator for up to 2-3 days. When you’re ready to make your chimichangas, just warm the filling gently, mix in your cheese, and proceed with wrapping. This little trick saves precious time on busy weeknights, allowing you to enjoy a quick, delicious meal with minimal fuss.
How do you achieve the perfect crispy shell for Beef and Cheese Chimichangas without deep frying?
Achieving that glorious golden crispiness for your Beef and Cheese Chimichangas without deep frying is simpler than you might think! The trick involves a light brush of oil or cooking spray on your tortillas before baking or air-frying. For baking, preheat your oven to a higher temperature, around 400°F (200°C), and bake until golden brown and crispy, flipping halfway. If using an air fryer, set it to about 375°F (190°C) and cook for 8-12 minutes, turning occasionally. This method ensures a beautifully crunchy exterior that perfectly encases the warm, flavorful filling.
What are the best cheese varieties to use in this recipe?
For a truly spectacular chimichanga, you want cheeses that melt beautifully and offer a delightful creaminess. A classic choice is a good quality Monterey Jack or a Mexican blend, which typically includes Monterey Jack, cheddar, and queso blanco. These cheeses provide excellent melt and a mild, savory flavor that complements the seasoned beef perfectly. You can also experiment with a touch of sharp cheddar for extra tang or even some Pepper Jack if you enjoy a little kick. The goal is gooey perfection, so choose something that promises to bubble and stretch when heated.


Leave a Comment